

DIY witch bells are a simple protective ritual craft made by attaching small bells, cords, charms, and optional herbs to a ring, ribbon, or door hanger. They are usually placed on a front door, bedroom door, altar space, or threshold so their sound marks movement and symbolically clears unwanted energy. To make them, choose bells that sound clear, set a respectful intention, assemble the bells securely, bless or dedicate them, then hang them where they can ring safely. They are not a guaranteed shield, but they can become a meaningful spiritual object for protection, mindfulness, and boundary-setting in the home.
What You Need Before You Start
Gather your materials before you begin so the craft feels focused rather than rushed. You will need three to nine small bells, a sturdy cord, ribbon, twine, leather strip, or chain, and a base such as a metal ring, key ring, small grapevine hoop, driftwood piece, or door-hanger loop. Have scissors, pliers, and strong knots or jump rings ready.
Optional additions include protective herbs such as rosemary, bay leaf, lavender, basil, cedar, or rue; charms such as keys, shells, evil eye beads, hag stones, small mirrors, or ancestral tokens; and written petitions on small paper. Use only herbs and symbols you understand and can handle safely.
Before making DIY witch bells, decide their purpose in one sentence: “These bells mark this threshold and support peace, protection, and welcome energy.” Keep the intention clear and ethical. Do not use sacred items from cultures or closed traditions you are not part of.
Check safety first. Avoid toxic plants around pets and children. Keep bells and beads large enough that they cannot become choking hazards. Make sure the final piece will not scratch the door, fall on someone, block a lock, or tangle in a pet’s collar.
Clean your workspace physically, then spiritually in a way that fits your practice: light incense, ring a bell, say a prayer, wash your hands, or sit quietly for a minute. The goal is not perfection. The goal is attention, respect, and a secure craft.
Step 1
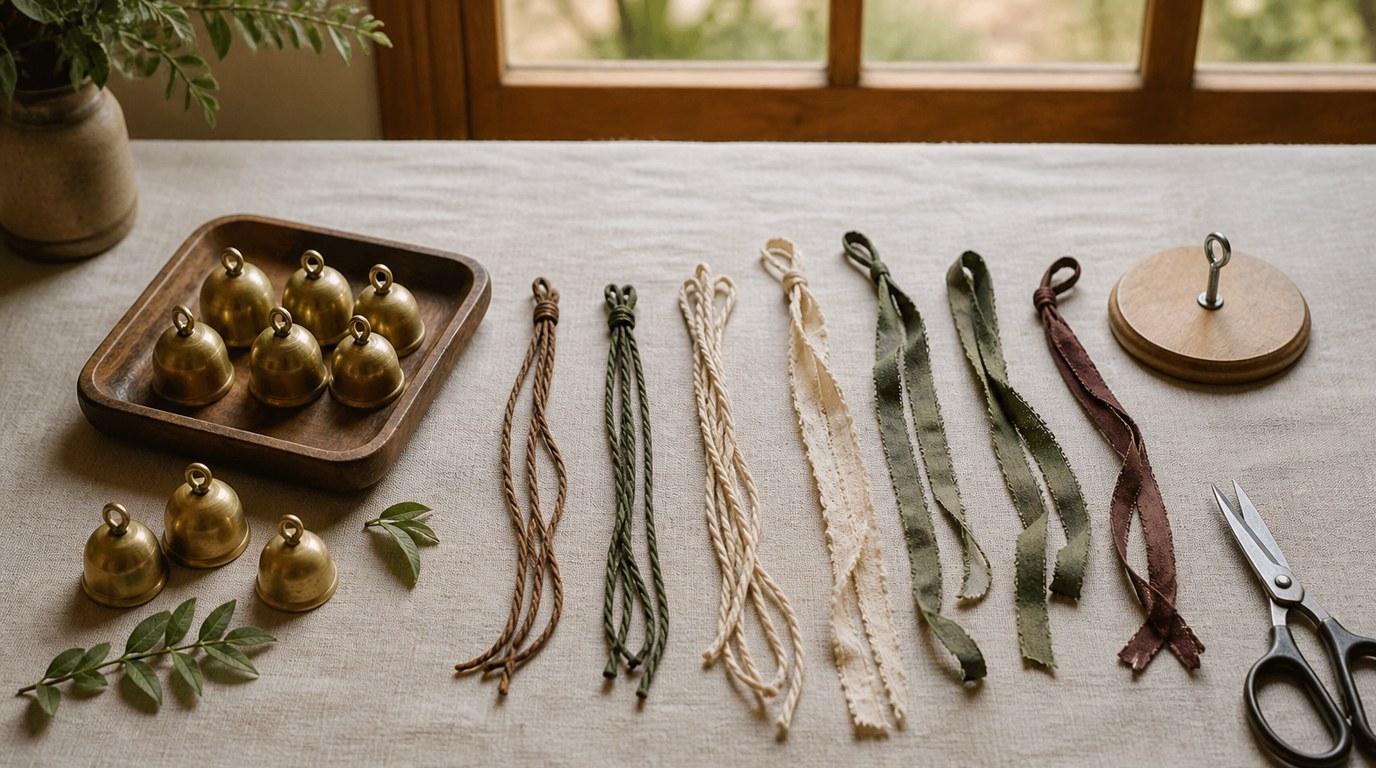
Choose the structure and prepare the pieces. Cut a length of cord or ribbon long enough to hang from your chosen base with extra room for knots. For most doors, 12 to 24 inches works well. If you want a fuller sound, use several shorter strands instead of one long strand.
Lay out the bells before tying anything. Ring each one and listen. Keep the bells that sound clean, bright, or pleasing to you. If one feels dull, cracked, or irritating, set it aside. Witch bells are meant to call attention, shift mood, and mark the threshold, so their sound matters.
Attach the first bell near the bottom of the cord. Tie it firmly with a double knot, or use a jump ring if you are working with chain. Add the remaining bells above it, spacing them so they can move freely. Do not pack them so tightly that they cannot ring. If using several strands, place one to three bells on each strand.
Add charms with intention rather than clutter. A key may represent access and boundaries. A shell may represent cleansing. A small mirror may represent reflection. A bead from a loved one’s necklace may carry ancestral comfort, if it is appropriate to use. If adding a written petition, fold it toward you for drawing in peace or away from you for sending away disruption, depending on your practice.
If using herbs, make a tiny bundle and tie it tightly, or place dried herbs in a small breathable sachet. Avoid loose crumbling herbs that will scatter whenever the door opens. As you add each item, speak its role aloud: “Rosemary for protection,” “Bell for warning,” “Key for guarded entry.”
Step 2
Assemble the witch bells into their final hanging form. Tie all strands onto the ring, hoop, branch, or door hanger. Pull each knot firmly and test it with a gentle tug. If anything slips, retie it now. A protective object should not feel physically unstable.
Balance the piece so it hangs evenly. Heavy charms should sit near the center or bottom, not all on one side. If the bells lean awkwardly, adjust the spacing or remove one item. More materials do not make the bells more powerful; clear intention and secure construction are better than excess weight.
Now dedicate the bells. Hold them in both hands or place them on a clean cloth. Breathe slowly. Say words that fit your tradition, such as:
“Bells of this threshold, ring with clarity.
Let peace enter. Let harm pass by.
May this home be watched, loved, and protected.”
If you work with ancestors, you may invite only well and benevolent ancestors to witness the blessing. Keep the wording respectful and specific. For example: “Beloved and well ancestors, bless this doorway with peace and discernment.” Do not command the dead or treat ancestral connection as decoration.
Caution: do not hang the bells where they will constantly slam, frighten animals, or disturb neighbors. If you live with trauma-sensitive people, babies, elders, or pets, choose a softer bell tone or a quieter placement. Spiritual tools should support the household, not agitate it.
After blessing, pass the bells through incense smoke, sprinkle lightly with water, touch them to salt, or simply ring them three times. Choose one method that matches your beliefs and materials. Do not wet metal that may rust, soak paper petitions, or burn herbs near fabric, dried plants, curtains, or doorframes.
Hang the finished bells and open the door once. Let them sound. Listen without rushing. If the sound feels too harsh, shorten the strand, remove a bell, or move the piece to an inner door.
How to Check the Result
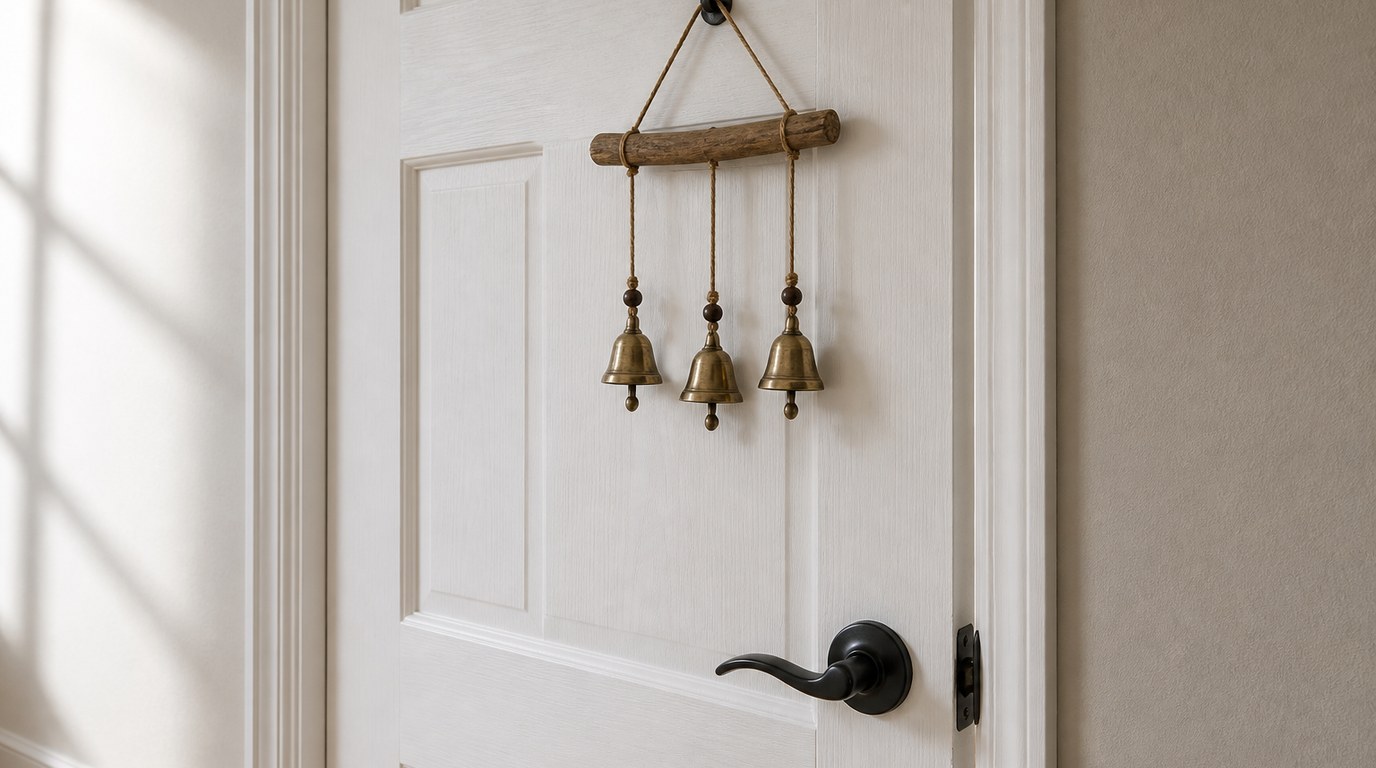
Your DIY witch bells are ready when they meet three checks: they are physically secure, spiritually clear, and practically placed.
First, test the structure. Open and close the door several times. The bells should ring without catching on the knob, lock, hinge, wreath, curtain, or wall hook. Tug lightly on the main hanger and each strand. Nothing should slide loose. If a knot weakens, fix it immediately. If the piece is too heavy, remove charms before it falls.
Second, listen to the sound. It does not need to be loud. It should feel noticeable, clean, and appropriate for the space. A soft chime may be better for a bedroom or ancestor altar area. A brighter tone may suit a front door. If the sound irritates you every time it rings, the placement or bell choice needs adjustment.
Third, check the feeling of the threshold. After hanging the bells, the space may feel more marked, intentional, calm, or alert. You may find that the sound reminds you to pause before entering or leaving, which is part of their protective function. Avoid expecting dramatic proof. Think of witch bells as ritual support, not a guarantee that nothing difficult can happen.
Common mistakes include using too many charms, tying weak knots, choosing toxic herbs, copying symbols without understanding them, or placing bells where pets can chew them. Troubleshoot by simplifying the design, replacing unsafe materials, re-blessing the bells, or moving them to a better location.
Refresh the bells monthly, after conflict in the home, after many visitors, or when they feel dull. Ring them, dust them, repeat your blessing, and replace worn herbs or frayed cord.
FAQ
How Many Bells Should Witch Bells Have?
Many people use three, five, seven, or nine bells because odd numbers are common in folk magic and ritual crafts. However, there is no single required number. Use the number that sounds good, hangs safely, and matches your intention.
Can I Make Witch Bells Without Herbs?
Yes. Herbs are optional. Bells, knots, charms, prayer, and intention are enough to make meaningful DIY witch bells. If you have pets, allergies, or limited supplies, skip herbs entirely or use a sealed written petition instead.
Do Witch Bells Have to Go on the Front Door?
No. The front door is traditional because it is a main threshold, but you can hang witch bells on a bedroom door, kitchen entrance, workspace, altar area, or back door. Choose a place where they can ring safely and intentionally.
Can Witch Bells Be Used with an Ancestor Altar?
Yes, if the use is respectful. You can hang softer bells near, not directly on, an ancestor altar to mark the space and invite peaceful presence. Dedicate them only to well and benevolent ancestors, and avoid loud ringing during quiet offerings.
What Should I Do If My Witch Bells Break?
First, handle sharp metal, glass, or beads safely. Then decide whether the break feels like normal wear or a spiritual sign. You can repair and re-bless them, replace damaged parts, or respectfully dismantle them and thank the object for its work.